


Amazon Web Services (AWS) is one of the famous and leading platforms that offer more than 200 fully featured services from data centers located all over the world and is the world’s most comprehensive cloud platform. Cloud computing platform such as AWS offers scalable and cost-effective services.
AWS is a broadly adopted cloud platform that offers several on-demand operations like compute power, database storage, content delivery, etc., to help corporates scale and grow.
In today’s tutorial, we will learn how we can extend or increase the root disk of an EC2 instance in AWS. For this tutorial, we are using an Ubuntu EC2 instance with 10 GB of storage and will try to increase the storage of the EC2 instance from 10 GB to 20 GB.
Prerequisites
- An EC2 instance of AWS
- Basic knowledge of AWS and Linux commands.
Modify the disk size of the Volume
To increase the root disk of the EC2 instance, follow the below steps:-
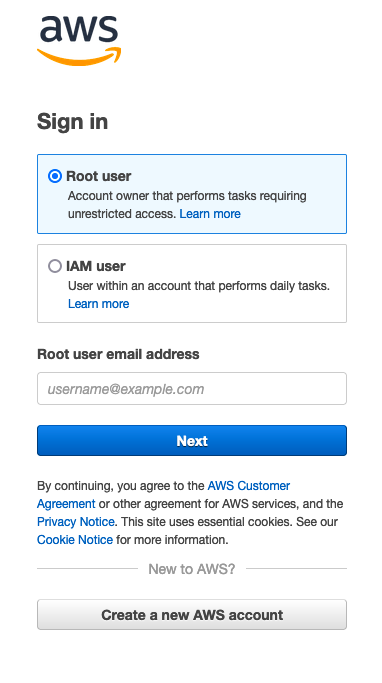
- Log into your AWS account.
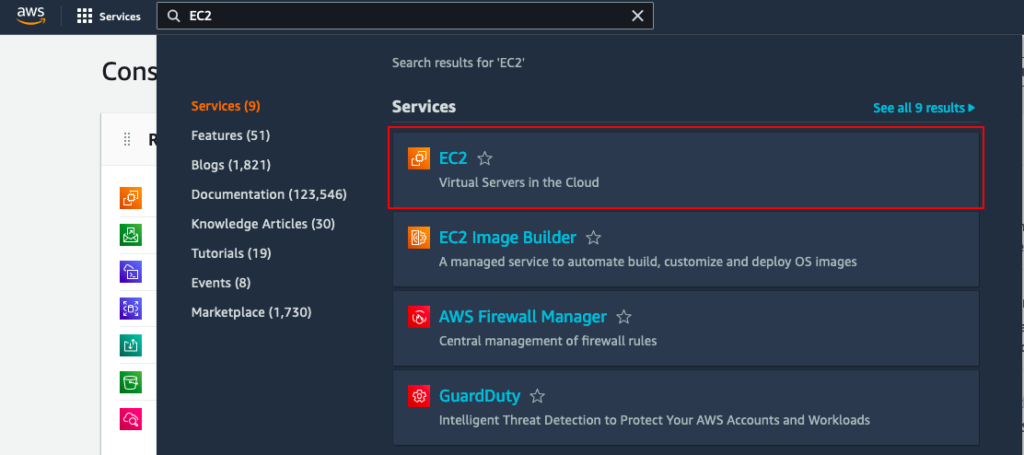
- In the AWS console, search for the EC2 service.
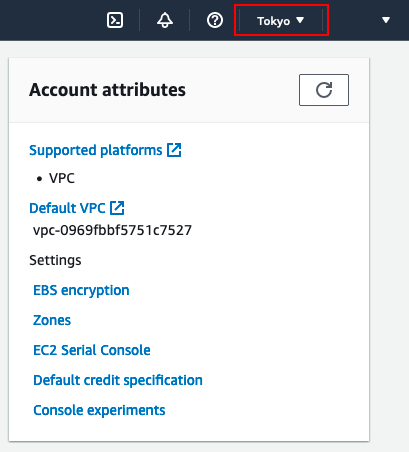
- Now select the Region in which the instance is running.
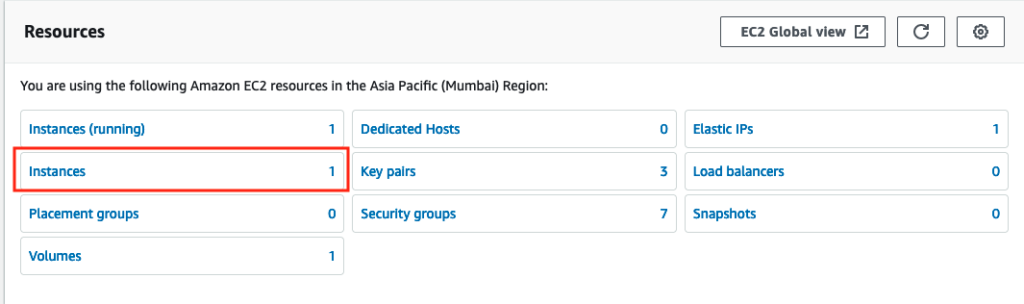
- Click on the Instances option.
- Select the instance for which you want to increase the disk space. Under the instance description, select the Storage option and then click on the root volume. You can find the name of the root volume with the help of the Root device details section.
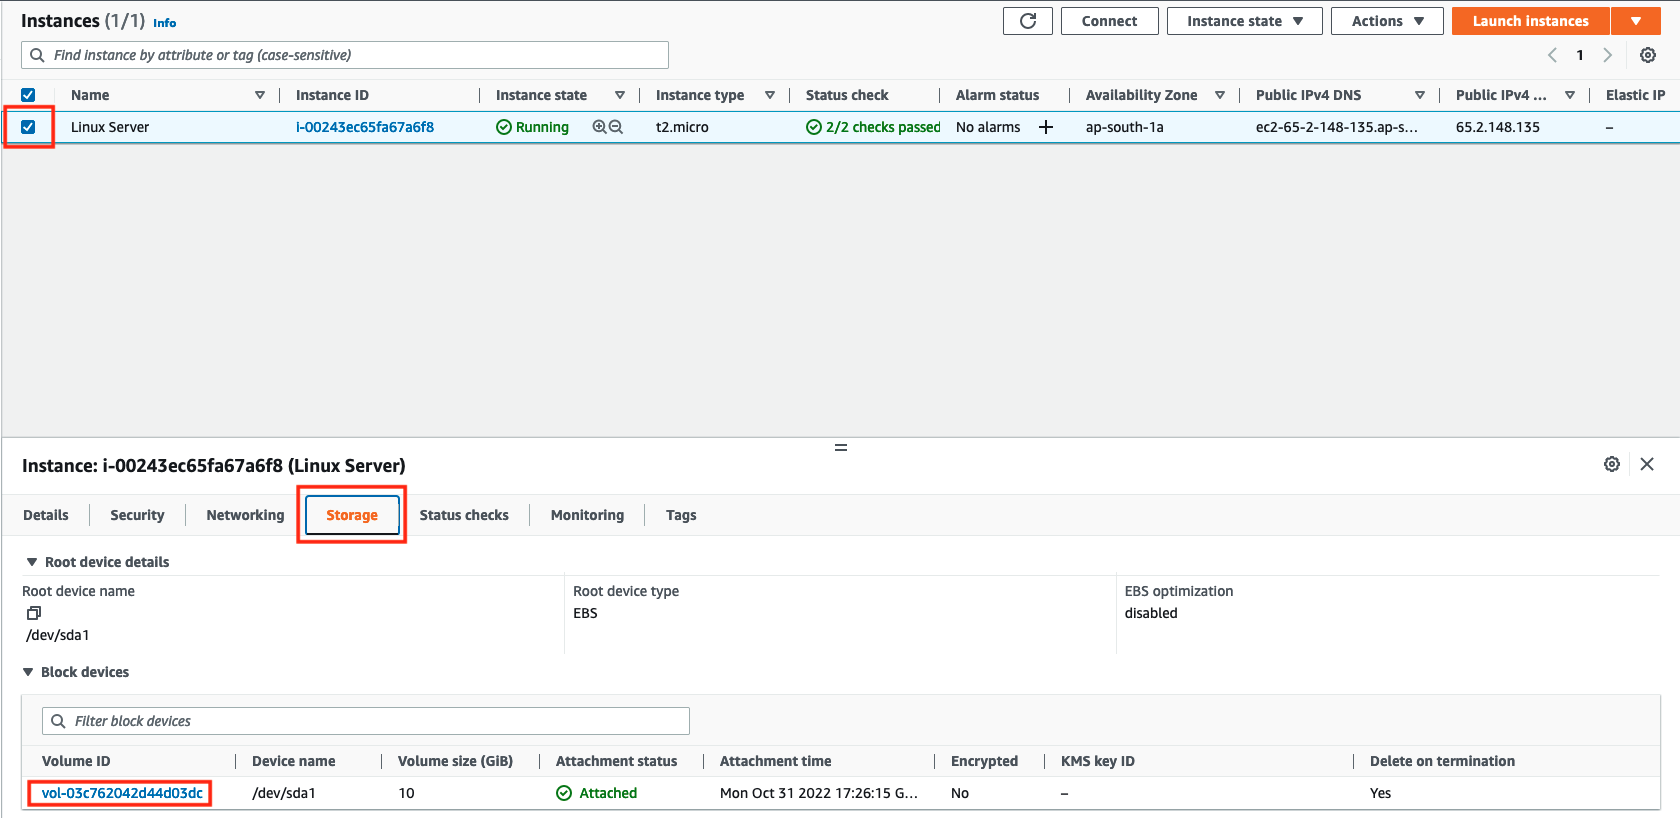
- Now click on the Volume ID.

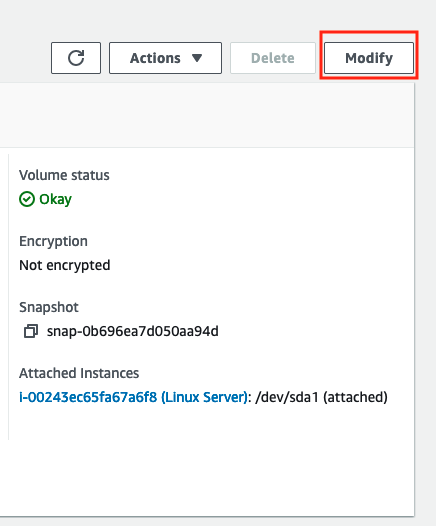
- Click on the Modify button present on the Right of the AWS dashboard.
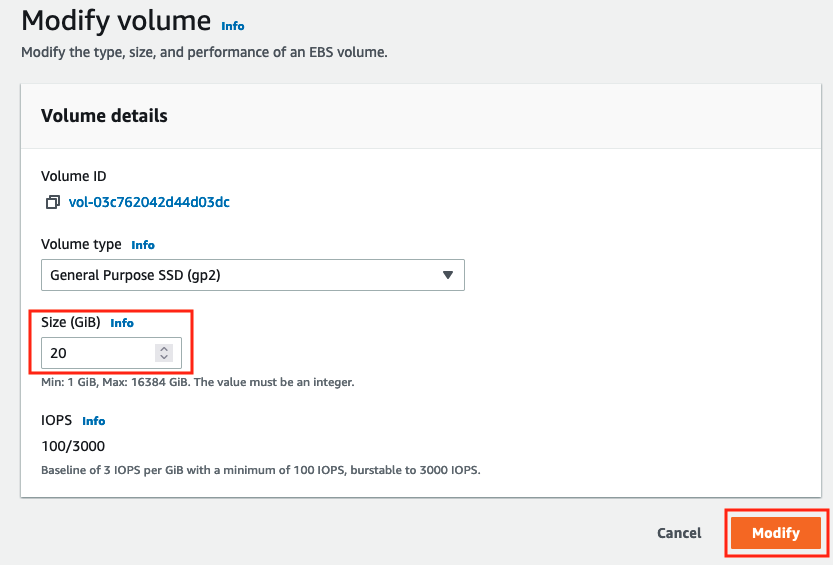
- Enter the disk size for the root volume and then click on the Modify button. A pop will appear, again click on the Modify button.
We have successfully increased the disk space of the EC2 instance.
Note: – We have increased the Disk size, but the File system of the server still has no idea about the extended space which we have added. To update and resize the file system to use that extended space, we need to reboot the server, or we need to manually update the Disk space of the server with the command line.
Update the Disk size with the command line
If you do not want to restart the instance. Only then, you have to manually update the Disk space of the server. If you can reboot the server without any issue, then simply reboot the server and skip all the below steps. If you can’t reboot the server, then follow the below command to manually update the Disk space.
Increase partition size
- Log into your AWS instance with the help of the SSH command.
ssh User@Server_IP -i ssh_key
- Now list all the file systems and disks mounted on the server with the following command.
sudo df -hT
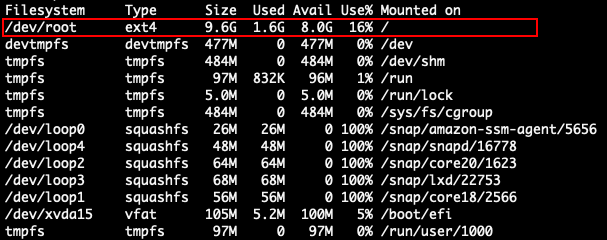
As we can see, the Size of the File system is 9.6 GB, and its File system type is ext4.
- Now we will check for the extended partition on the Disk with the help of the lsblk command.
sudo lsblk
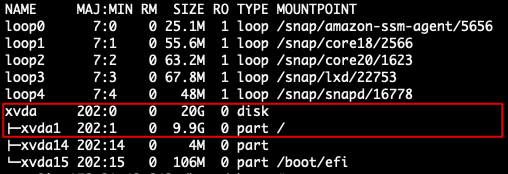
As we can see, the root volume (/dev/xvda) has a partition (/dev/xvda1) and the size of the volume is 20 GB, but the size of the partition is still 9.9 GB.
- Now we need to update the size of the partition with the help of the growpart command.
sudo growpart /dev/xvda 1
- Verify the partition that the partition is extended or not. Use the lsblk command to check.
sudo lsblk
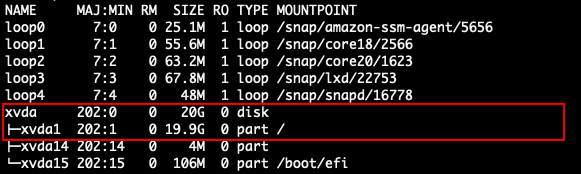
As we can see, the size of the partition is updated and extended from 9.9 GB to 19.9 GB. To use this extended partition, we need to update the size of the File system.
- After extending the partition, we now need to extend the size of the file system. Before extending the file system, let’s check the current size of the File system with the df command. Currently, the root file system is 9.6 GB in size and must be extended.
sudo df -hT
Note:- Different file system has different commands to extend and update the size of the file system.
- Our EC2 instance has an ext4 file system on the server. To extend an ext4-based file system, we need to use the resize2fs command.
sudo resize2fs /dev/xvda1

- Again, check all the file systems on your EC2 instance with the help of the df command.
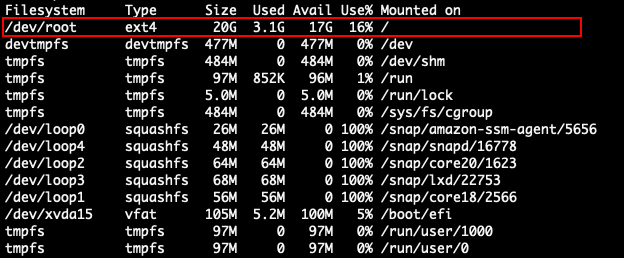
As we can see, after executing the resize2fs command. The size of the file system is updated and increased from 9.6 GB to 20 GB.
Conclusion
In this tutorial, we have learned how we can easily increase the storage of the EC2 instance. AWS a variety of services and EC2 is one of them. When increasing the size of the disk, it is always advisable to take a snapshot of the disk and avoid decreasing the disk size of the instance.
If you guys have any questions or queries, then let me know in the comments section.