


Imunify Security is an intelligent antivirus and security monitoring tool for servers and websites. Imunify is a collection of security solutions for hosting providers and VPS owners. The aim of Imunify is to protect servers from various malware, malicious attacks, bad robots, etc.
Imunify360 is a complete multi-layered security package for Linux web servers with antivirus, firewall, patch handling and domain reputation. Imunify is developed by CloudLinux. CloudLinux is the maker of the most stable and secure operating system for hosting providers.
Features of imunifyAV
- Rapid Scan
- Low Resource Usage mode
- Brute-force attack protection
- Malware Database Scanner (MDS)
- Webshield
- Captcha
- Configuring reCAPTCHA keys
- CDN Support
- Anti-bot protection
- Overridable config
- External Black/Whitelist Management
- Notification
Imunify offers three types of security –
- Imunify AV :- Imunify AV is a free version which only offers malware scans. It detects all types of Web-Shells, viruses, phishing pages etc.
- Imunify AV+ :- Imunify AV+ is a paid version that offers malware scans and One-click malware cleanup. It also offers a user-friendly GUI panel. So, you can control and monitor the security and computing resources for all websites and users on a server.
- Imunify360 :- Imunify360 is a paid version which provides multi-layer protection. It offers an Application Firewall, Network Firewall, Real-time Antivirus protection etc.

Supported Operating System:-
| OS | Version |
|---|---|
| CloudLinux / RHEL / CentOS | 6, 7, 8 |
| Ubuntu | 16.04 (LTS only), 18.04 and 20.04 (LTS) |
| Debian | 9 and 10 |
In today’s tutorial, we will learn how we can install the basic and forever free Imunify AV version on our Linux server with the command line.
Note:- If a panel is already installed on the server, such as Plesk, cPanel, DirectAdmin and ISPmanager then the installation steps will be different.
Requirements
- Linux-based Operating System
- Minimum 512 Mb of RAM
- Minimum 20 GB of free disk space
- Access of Root user or another user with sudo privileges
Configure the ImunifyAV UI
ImunifyAV UI works as a single-page application and requires a web server to serve the contents. To access the ImunifyAV panel, we need to create a configuration file.
To create the configuration file, follow the below steps
- Create the required directories
mkdir -p /etc/sysconfig/imunify360
- Create the configuration file with your preferred editor.
vim /etc/sysconfig/imunify360/integration.conf
- Paste the following content in the configuration file with the path that will serve web-based UI.
[paths]

ui_path = /var/www/imav.domain.com/public_html/
While installing, ImunifyAV automatically copies UI files in the directory which we have created above.
ImunifyAV installation
- Install the required packages for the installation.
yum install wget curl screen -y
- Download the ImunifyAV installation script with the following command.
wget https://repo.imunify360.cloudlinux.com/defence360/imav-deploy.sh -O imav-deploy.sh
- To view all the available options for installations, run the following command.
bash imav-deploy.sh -h
- To install the ImunifyAV on the Linux Server, run the script with the following command.
bash imav-deploy.sh
Beta Version
To install ImunifyAV beta version, run the installation script with the “–beta” argument.
bash imav-deploy.sh --beta
With License Key
If you already have a license key for Imunify, download and run the installation script with the license key.
wget https://repo.imunify360.cloudlinux.com/defence360/imav-deploy.sh -O imav-deploy.sh
bash imav-deploy.sh --key YOUR_KEY
With IP-based License
If you have an IP-based license key, then download and run the installation script with IPL (IP-based license) as the license key.
wget https://repo.imunify360.cloudlinux.com/defence360/imav-deploy.sh -O imav-deploy.sh
bash imav-deploy.sh --key IPL
Update the ImunifyAV
To update the ImunifyAV run the following command as per your operating system.
Ubuntu
To update the ImunifyAV, use the below command.
apt-get update
apt-get install --only-upgrade imunify-antivirus
To update the beta version (Ubuntu 18.04), then run the following command.
echo 'deb https://repo.imunify360.cloudlinux.com/imunify360/ubuntu-testing/18.04/ bionic main'  > /etc/apt/sources.list.d/imunify360-testing.list
apt-get update
apt-get install --only-upgrade imunify-antivirus
If you do not want to install any type of update, then remove the beta repository with the following command.
rm /etc/apt/sources.list.d/imunify360-testing.list
apt-get update
CentOS
To update the ImunifyAV, use the below command.
yum update imunify-antivirus
To update the beta version, then run the following command.
yum update imunify-antivirus --enablerepo=imunify360-testing
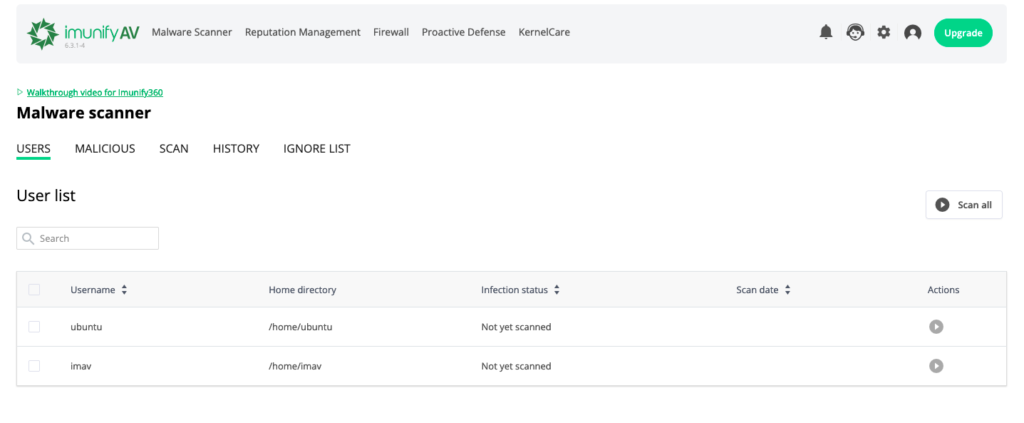
ImunifyAV Panel
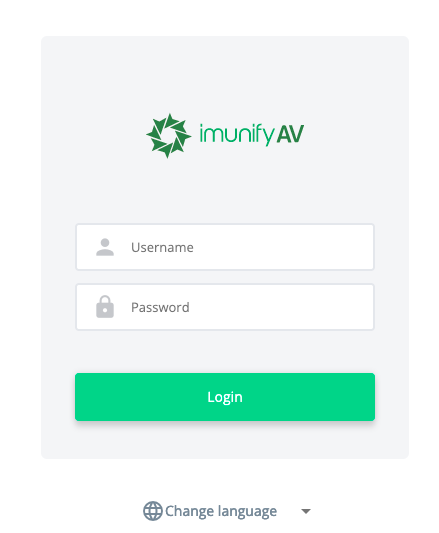
Open the domain or subdomain for which the ImunifyAV user interface was configured. Use the credentials of the root user to log in.
https://imav.domain.com
For a quick scan, click on the Scan all button.
Conclusion
In today’s tutorial, we have learned about ImunifyAV and its features, and how we can install ImunifyAV on a Linux server. ImunifyAV is one of the popular Antivirus. ImunifyAV provides a complete set of protection with antivirus, firewall, patch handling and domain reputation.
If you guys have any questions or queries, let me know in the comments section.